
The Java Development Kit is necessary if you want to be able to develop Java applications. In this post. I will go into how to set up your machine for Java development.
The mode of set up I am using is done with the view to preparation for set up of Android on the development machine you are using.
The following steps will enable you develop Java on you machine:
- Download the Java Development Kit from the Java website.
- Click on the download button of Java logo. Not the Netbeans image. (Netbeans is a Java editor. The only problem with using Netbeans is that you need to keep the option of compiling Java programs without it)
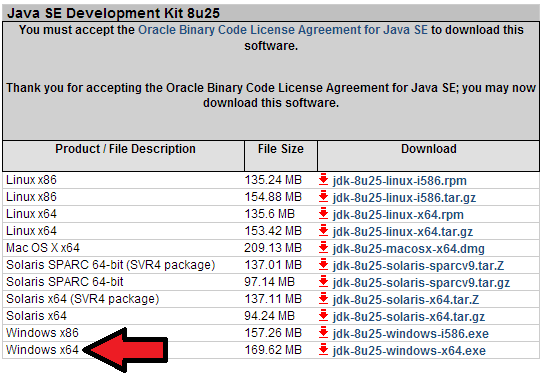
- Accept the license to download the Java Development Kit.

- Click on the version of Java compatible with your system. I am using a 64 bits machine, so I select the executable file for it.
- Wait for your download to conclude in your browser.

- Once your download is completed, run the setup by double-clicking on it.
- Your setup will bring up the security control. Accept it.
- You will see the following screen

- Click on the Next button. You will see a screen for choosing your installation path. The most important thing to note here is your installation directory for Java. It is highlighted in red.

- Click on the Next button. Your installation will start.

- A pop up will come up asking you to install Java to a different location.

- Change this folder to the Java folder. It makes it easier to set your class path.
- You will see this screen next.

- Congratulations, you have success fully installed the Java Development Kit
Now that the Java Development Kit has been installed, You need to set the class path. This will enable you run Java programs on your machine.
We will do that in the next tutorial.
No comments:
Post a Comment