Welcome to this section of the weekly
series SVG with RaphaelJS. In the last section, we covered how to
drag and drop a RaphaelJS element. In this section, we shall cover
how to detect if two RaphaelJS elements are colliding with each
other.
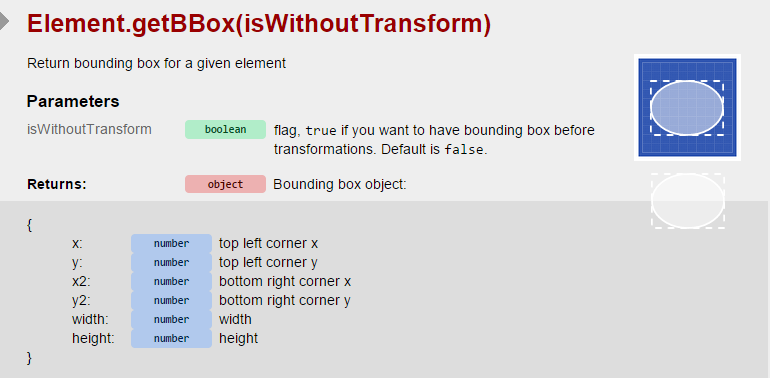
In order to do this, we need to use a
bounding box. A bounding box gives us the area around the RaphaelJS
element in question. Below is a diagram that shows us this effect.

Getting a bounding box involves using the getBBox command. The parameters returned by this command are the values you see in the above diagram.
We use the same circle element as
before. Once we get the bounding box of the circle, we retrieve the x
and y values of the circle and use its width and height for the
rectangle we want to create.
Remember that the syntax to create a
rectangle is:
Paper.rect(x, y, width, height, [r]);
Comparing this to our image above, x
and y would be the starting points for the bounding rectangle whlie
the width and height would be the width and height of the bounding
box respectively.
[r] is an optional parameter that
represents the border radius. We don't need it for this case so we
won't use it.
The code to do this is given below:
| $(function(){ var paper = Raphael('container', 500, 500); | |
| // Draw a circle at the left hand side of the viewport | |
| var circle = paper.circle(100, 250, 50).attr({ 'fill' : 'red', 'stroke-width' : 5 }); | |
| // Get the bounding box of the circle | |
| var boundingBox = circle.getBBox(); | |
| // Draw the rectangle using components from the bounding box | |
| paper.rect(boundingBox.x, boundingBox.y, boundingBox.width, boundingBox.height); | |
| }); |
The code above produces the output
shown below:
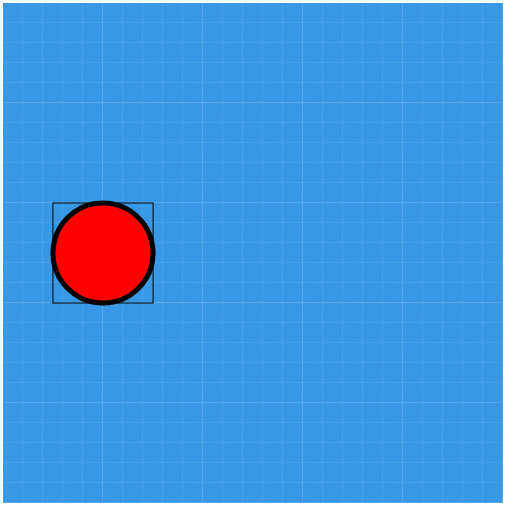
Please notice the rectangle around the
circle. It shows the bounding box of the circle. An important
application of this concept is to check for overlaps of two elements.
I will cover that next.
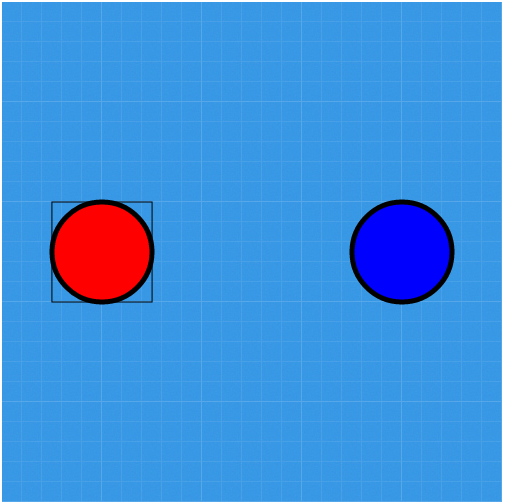
To illustrate this concept, I will draw
another circle at the position of x = 400 and y = 250 with the radius
= 50. We give the circle we are drawing a colour of blue to
differentiate it from our previous circle.
I expect that at this point, you can
write the code to do that so I will only show the output.
Lets add our drag methods to the first
circle as before however this time in the dragend method, we add an
alert method that allows us know if the two circles intersect.
In the dragstart method, we add the
toFront() method to first circle to the front of the second circle
when dragging starts.
The updated code or the drag functions
is shown below:
| $(function(){ var paper = Raphael('container', 500, 500); | |
| // Draw a circle at the left hand side of the viewport | |
| var circle = paper.circle(100, 250, 50).attr({ 'fill' : 'red', 'stroke-width' : 5 }); | |
| // Get the bounding box of the circle | |
| var boundingBox = circle.getBBox(); | |
| // Draw the rectangle using components from the bounding box | |
| paper.rect(boundingBox.x, boundingBox.y, boundingBox.width, boundingBox.height); | |
| // Draw a circle at the left hand side of the viewport | |
| var circle1 = paper.circle(400, 250, 50).attr({ 'fill' : 'blue', 'stroke-width' : 5 }); | |
| circle.drag(dragmove, dragstart, dragend); | |
| function dragstart(x, y, e){ | |
| this.toFront(); | |
| this.current_transform = this.transform(); | |
| this.attr("fill", "yellow"); | |
| } | |
| function dragmove(dx, dy, x, y, e){ | |
| this.transform(this.current_transform+'T'+dx+','+dy) | |
| } | |
| function dragend(e){ | |
| this.current_transform = this.transform(); | |
| this.attr("fill", "red"); | |
| // Get the bounding box for the target circle | |
| var targetBBox = circle1.getBBox | |
| /* Check if the bounding boxes intersect */ | |
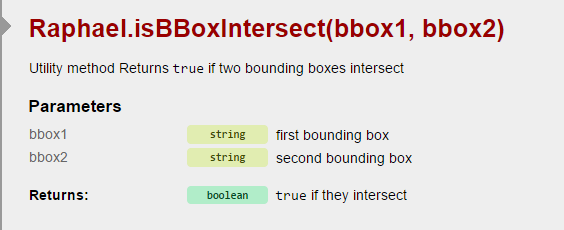
| if(Raphael.isBBoxIntersect(boundingBox, targetBBox)){ | |
| alert("The bounding boxes intersect."); | |
| } | |
| else{ | |
| alert("The bounding boxes intersect."); | |
| } | |
| } | |
| }); |
This concept is important if we decide
to use SVG for collision detection. Collision detection is an
important concept in game development.
This is the tenth part of this series.
I have used this first 10 parts to cover basic concepts in using SVG
with RaphaelJS. The purpose was to lay the ground work for projects
we want to undertake.
From the next section, we shall look at
how to create interactive maps. This project will tie in the concepts
covered so far.
it doesnt even work..
ReplyDelete