Welcome to this section of the weekly
series SVG with RaphaelJS.
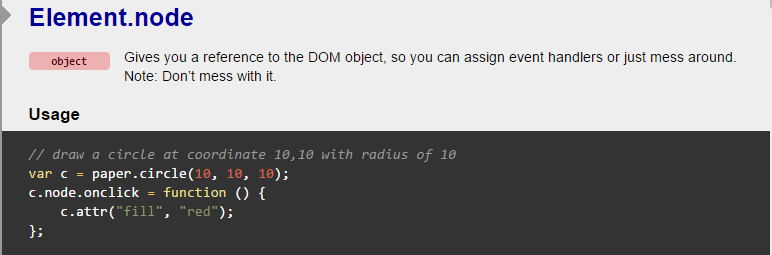
The node property is a reference to the
DOM object so that you can manipulate elements in RaphaelJS using
third party libraries.
In order to work with other JavaScript
libraries our RaphaelJS elements must have their DOM exposed. So far
we have used jQuery in our code but we haven't integrated it into
RaphaelJS. In this section, we will do that.
Our template code file is given below:
| $(function(){ var paper = Raphael('container', 500, 500); | |
| }); |
Note that the first line is actually a jQuery command that lets the page load first before we do any other thing on the page.
Google Developer Tools
Google Chrome
browser is in my opinion the best browser for a web developer because
of its simplicity.
In order to use
it, view the template code in the Google Chrome browser (I admit that
I have always assumed you were using it). Hold down Ctrl + Shift and
then press I on your keyboard. It will bring out the developer tools.
The diagram is shown below:
The most important
tab is the Console tab. It allows us to detect errors in our programs
and will even inform you of the line causing the problem.
Accessing a RaphaelJS Element in the
DOM
It is important to
understand that SVG is part of the DOM structure. As a result, you
can inspect SVG elements in the Chrome console.
In this example, I
will use a circle to illustrate this concept. The circle will be
given an id of circle using the Element.node method and we will use
that reference to assign a click method to the circle in jQuery.
The code to do
this is given below:
| // Draw a circle at the center of your canvas var circle = paper.circle(250, 250, 50); | |
| // Set the attributes of the circle | |
| circle.attr({ fill: "red", cursor: "pointer" }); | |
| circle.node.id = "circle"; | |
| $("#circle").click(function(){ | |
| alert(1); | |
| }); |
Copy and paste the above code below your the var paper = Raphael('container', 500, 500); in your init.js file.
You can view the repository here.
Using Qtip
Qtip is a
JavaScript library that provides tooltips on DOM elements. In order
to use it, simply download it and include its CSS file in the css
directory of your project and the JavaScript file in the js directory
of your project.
Next call them
from your index.html file. The file now looks like this:
| <!DOCTYPE html> <html> | |
| <head> | |
| <meta charset="utf-8"> | |
| <title>RaphaelJS Template</title> | |
| <link rel="stylesheet" href="css/default.css"> | |
| <link rel="stylesheet" href="css/jquery.qtip.css"> | |
| <script src="js/jquery.js"></script> | |
| <script src="js/jquery.qtip.js"></script> | |
| <script src="js/raphael.js"></script> | |
| <script src="js/init.js"></script> | |
| </head> | |
| <body> | |
| <div id="container"></div> | |
| </body> | |
| </html> |
Note the inclusion of both the CSS and JavaScript files of qtip. In order to use qtip in our code, we access the node element of the RaphaelJS element in our code. Paste the following lines of code below code in your init.js
| $(circle.node).qtip({ content: { text: 'Hello. I am in the DOM' }, | |
| style: { | |
| background: '#000000', | |
| color: '#ffffff', | |
| border: { width: 6, radius: 3, color: '#ff0000' } | |
| }, | |
| position: { | |
| my: 'left center', | |
| at: 'bottom center', | |
| target: 'mouse', | |
| adjust: { x: 20, y: 25 } | |
| } | |
| }); | |
| console.log(circle.node); |
Save your work and
check it out in the browser. Now when you mouse over the circle, it
pops up a message. You can view it on my dropbox.
In this section,
we have looked at how to use RaphaelJS with other JavaScript
libraries. This concept will prove useful when we want to create
interactive maps.
No comments:
Post a Comment