Thursday, 7 September 2017

Publishing Choices


This graphic from Reedsy covers the differences between Self Publishing and Traditional Publishing. Reedsy is a marketplace for editors and designers so there opinion differs from my reality.

I agree with most of the graphic apart from the section on Upfront cost. When I wrote my first book, I had no money. Trust me on this if I had £1000 - £3000 extra to spend on a book, I won't be a published author.

Thankfully I have been in tech for a while so I know that its easy to get things for free if you are willing to get your hands dirty.

I wrote, edited and created my book cover design all by myself. In the process, I got better at entire process of digital publishing.

Today, I am writing my 4th book and I have done all the steps myself. Will it be perfect? No.

But for this Nigerian, done is better than perfect.

Wednesday, 6 September 2017

Internship Opportunity


Mobile Web Ghana is offering smart young people internship opportunities to gain practical experience in their chosen fields. We have put together an exciting and educative package for all who would qualify for this internship program. The purpose of the internship is to strengthen the individual’s expertise in his/her chosen field and also to expose them to the experience of working in a corporate environment and in a team of like-minded people.

Specifically, we are looking for smart young people in the following fields:

Graphic Design & Software Development: The person must have the ability to write basic computer programming and have a working language in Content Management systems. He must be very creative to design fliers, publications, banners etc. He / She should have the ability to create concepts and develop them with or little supervision.
Sales and Marketing: The Sales and Marketing intern should be one who has a Marketing and sales background, creative, proactive, and intelligent to help market projects and sell training programs both on and offline. He must be a goal getter, result oriented, excellent interpersonal and communications skills.

Interested persons should send their CVs to info@mobilewebghana.org.

Epa


Epa is the symbol of law and justice, slavery and captivity.

We will use a grid of 5 pixels to trace out the image. The image of this is shown below:


This symbol consist only of straight lines. It consists of an intersecting symmetric shape. Once you draw one shape, you can use that to draw the other shape. We will start with the shape on the left hand side.

The plan to draw this shape is as follows:

  1. Lift the turtle
  2. Move the turtle to the position of the center of the left most part of the shape
  3. Set the size of the pen to 4 units of the square
  4. Find the distance to the upper position
  5. Find the angle to the upper position
  6. Place the pen down
  7. Draw a line to the upper position at the angle of the position
  8. Find the distance to the outer final point
  9. Find the angle to the outer final point
  10. Draw a line to the outer final point from the upper position
  11. Lift up the pen
  12. Move it back to the upper position
  13. Find the distance to the inner final point
  14. Find the angle to the inner final point
  15. Place the pen down
  16. Draw a line to the inner final point from the upper position
  17. Lift up the pen
  18. Move the pen back to the starting position in step 2
  19. Find the distance to the lower position
  20. Find the angle to the lower position
  21. Place the pen down
  22. Draw a line to the lower position at the angle of the position
  23. Find the distance to the outer final point
  24. Find the angle to the outer final point
  25. Draw a line to the outer final point from the lower position
  26. Lift up the pen
  27. Move it back to the lower position
  28. Find the distance to the inner final point
  29. Find the angle to the inner final point
  30. Place the pen down
  31. Draw a line to the inner final point from the lower position
  32. Repeat the steps for the shape on the right hand side
Using Turtle Graphics

We will use the grid from the last section. Rename template.py to epa.py. The size of each square on our grid is 10 pixels. We shall use this as our multiplication factor.

From step 1 of our algorithm, we need to lift the pen. The code to do this is shown below:

turtle.penup()

To move the turtle to the position of the center of the left most part of the shape, we need to get its location. This location is at the point where (-170, 0). When we multiply by 10, we know that we have to move the turtle to (-170, 0). The code to do this is shown below:

turtle.setposition(-170, 0)

We set the pensize of the turtle to 4 units. Since our multiplication factor is 10, we will use 40. The code to do this is shown below:

turtle.pensize(40)

The upper position is situated at (-8, 10). Using our multiplication factor, this will be (-80, 100). To find the distance between the two points, we will use a function called coordinateDistance. The function definition is given below:

def coordinateDistance(x1, y1, x2, y2):
    dx = x1 - x2
    dy = y1 - y2
    D = math.sqrt((dx * dx) + (dy * dy))
    return D

After we define this function in our code, we do the following:

upperLength = coordinateDistance(-170, 0, -80, 100)

Now that we have the length of the distance between the two points, we only need to find the angle. Using the formula to find the angle between two points, our code will now be:

myradians = math.atan2(100 - 0, -80 - (-170))
upperAngle = math.degrees(myradians)
turtle.setheading(upperAngle)

Now we can draw the line to that point. Before we do this, we need to place the pen down. The code to do this is shown below:

turtle.pendown()

Now that the heading is set and our pen is down, all we need to do is to draw the line. The code to do this is given below:

turtle.forward(upperLength)

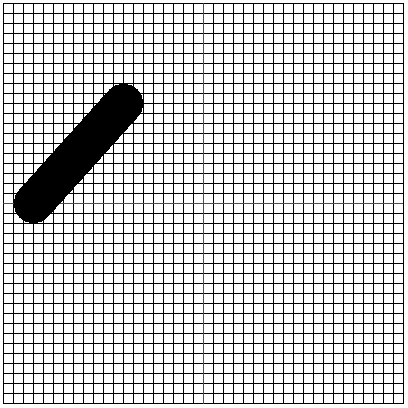
The generated image is now as shown below:


From this point, we can draw a line to the final point. The final point however comes with some complications. It diverges into two points. The trick then would be to use two positions taking them as the outer and inner points.

We will do for the outer point first. Its coordinates are (8, 0). Using the multiplication factor, this will be (80, 0). Based on step 8 we find the distance to the outer final point the code to do this is shown below:

outerUpperLength = coordinateDistance(-80, 100, 80, 0)

Next we need to find the angle to the outer final point. The code to do this is shown below:

myradians = math.atan2(0 - 100, 80 - (-80))
outerUpperAngle = math.degrees(myradians)
turtle.setheading(outerUpperAngle)

Next we draw a line to the outer final point from the upper position. The code to do this is shown below:

turtle.forward(outerUpperLength)

The generated image is now shown below:


We lift up the pen to go back to the upper position. The code to lift the pen is given below:

turtle.penup()

Next we move the pen back to the upper position. The code to do this is shown below:

turtle.setposition(-80, 100)

The coordinates of the inner final point are (5, 0) multiplication by 10 gives us (50, 0). The code to find the distance to this point is:

innerUpperLength = coordinateDistance(-80, 100, 50, 0)

To find the angle to this point, we use the code shown below:

myradians = math.atan2(0 - 100, 50 - (-80))
innerUpperAngle = math.degrees(myradians)
turtle.setheading(innerUpperAngle)

We need to place the pen down. The code to do this is shown below:

turtle.pendown()

Next we draw a line from the upper point to the inner final point. The code to do this is shown below:

turtle.forward(innerUpperLength)

The generated image is shown below:


Now we can go on to draw the lower portion of the shape. Before we can do that we need to lift up the pen so that it doesn’t draw while we are moving it. The code to do this is shown below:

turtle.penup()

Now we have to move the turtle back to its starting point. The code to do this is shown below:

turtle.setposition(-170, 0)

The location of the lower position is at (-7, -10). Multiplication by 10 gives us the point (-70, -100). The code to find the length is given below:

lowerLength = coordinateDistance(-170, 0, -70, -100)

The next task we have is to find the angle to the lower point. The code to do this is shown below:

myradians = math.atan2(100 - 0, -80 - (-170))
lowerAngle = math.degrees(myradians)
turtle.setheading(360 - lowerAngle)

Before we can draw a line, we must place the turtle down. The code to do this is shown below:

turtle.pendown()

We now draw the line from our starting point to the lower point. The code to do this is shown below:

turtle.forward(lowerLength)

This generates the image shown below:


Now we must find the distance from the lower point to the outer final point. The code to do this is:

outerLowerLength = coordinateDistance(-70, -100, 80, 0)

We must now find the angle from the lower point to the outer final point. The code to do this is:

myradians = math.atan2(0 - (-100), 80 - (-70))
outerLowerAngle = math.degrees(myradians)
turtle.setheading(outerLowerAngle)

Now we draw a line from the lower point to the final outer point. The code to do this is:

turtle.forward(outerLowerLength)

Our generated image now becomes:


Now we lift up the pen. The code to do this is:

turtle.penup()

Now we move it back to the lower position. The code to do this is shown below:

turtle.setposition(-70, -100)

Now we find the length between the lower point and the inner final point. The code to do this is:

innerLowerLength = coordinateDistance(-70, -100, 50, 0)

Now we calculate the angle between the two points and set the heading of our turtle to the angle. The code to do this is:

myradians = math.atan2(0 - (-100), 50 - (-70))
innerLowerAngle = math.degrees(myradians)
turtle.setheading(innerLowerAngle)

We now place the pen down as we are about to draw the line. The code that does this is:

turtle.pendown()

We can move the turtle forward to complete the drawing. The code to do this is shown below:

turtle.forward(innerLowerLength)

The generated image is now shown below:


With this, the left side of our image is complete. We will assume that the right side is symmetrical. So we will create it as a mirror imageof the left hand side.

The first step of the algorithm is to lift up the turtle. The code to do this is shown below:

turtle.penup()

Next we have to lift the pen to the right most part of the shape. The coordinates for this location are (170, 0). The code to move to this position is given below:

turtle.setposition(170, 0)

If you run the code at this point, you will see that it still takes the heading from when it was drawing the previous shape. We will change the heading to make it face the left side. To do this we need to make the heading the value of 180. The code to do this is shown below:

turtle.setheading(180)

Now to draw all that we need to do is to reuse the variables from drawing the other side and draw our shape.
We place the pen down. The code to do this is:

turtle.pendown()

We now set the heading of the turtle using the upperAngle value. We subtract by 180 because of the value we are compensating for.

turtle.setheading(180 - upperAngle)

Now we draw the line to that point. Our code now becomes:

turtle.forward(upperLength)

The image this will generate is now shown below:


Now we draw a line to the outer final point. The code that does that is:

turtle.setheading(180 - outerUpperAngle)
turtle.forward(outerUpperLength)

The image that is generated is shown below:


Now we lift up the pen. The code to do this is:

turtle.penup()

Next we have to move back to the upper right point. Its coordinate is (80, 100). The code to do this is shown below:

turtle.setposition(80, 100)

Now we must set the heading of the turtle to the innerUpperAngle. The code to do this is:

turtle.setheading(180 - innerUpperAngle)

Then we move forward by the innerUpperLength. The code to do this is:

turtle.forward(innerUpperLength)

We lift up the pen. This will prevent it from drawing. The code to do this is:

turtle.penup()

Now we move the turtle back to the righmost point. The code to do this is:

turtle.setposition(170, 0)
turtle.setheading(180)

Now that it is back at this point, we need to draw a line to the lower point. The code that does this is:

turtle.pendown()
turtle.setheading(180 + lowerAngle)
turtle.forward(lowerLength)

The generated image is shown below:


Now we draw the line to the outer final point. The code to do this is given below:

turtle.setheading(180 - outerLowerAngle)
turtle.forward(outerLowerLength)

The generated image now becomes:


To complete this shape, we just need to draw the line from the lower hand back to the inner final point. The code that does this is given below:

turtle.penup()
turtle.setposition(70, -100)
turtle.setheading(180 - innerLowerAngle)
turtle.pendown()
turtle.forward(innerLowerLength)

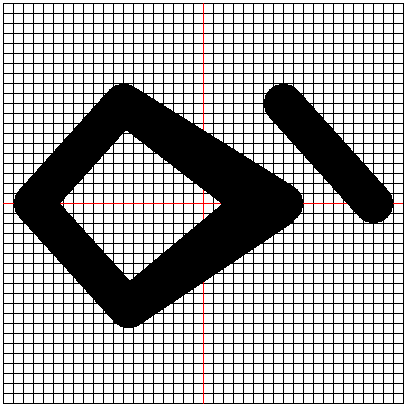
The generated image is now:


Conclusion

At the end of this post, we have successfully used Python Turtle Graphics to draw the Epa symbol.

I must admit that is was tasking to do because of the way the lines diverge but at the end, we made it happen.

Feel free to experiment with the pensize of the turtle and also the coordinates of the inner and outer final points. On my end, its a wrap.

Monday, 4 September 2017

Summer Open School


On 28 - 30 September 2017, Open Foundation West Africa will hold the first ever Summer Open School in the Sub Sahara African Region in Accra, Ghana at the Lancaster University.

The Summer Open School seeks to bring together open advocates, tech enthusiasts and people with the desire to know more about open resources under one roof, to afford these participants the opportunity to learn about the different open resources and to possibly become contributors  and avid users of such resources.

Again this will help participants and trainers alike to discuss critical issues, network and be abreast with the new trends within the Open movement. There will be different trainers who will lead different trainings, breakout out sessions and talks all aimed at promoting education, culture and heritage information and information and technology in Ghana through the use of free
and accessible open  source softwares.

The Summer Open School will take participants through sessions on Wikipedia and other sister projects (Wikidata, Wikimedia Commons, etc), Creative Commons, Open Street Maps (OSM) and Mozilla. Developers or people desirous of knowing more about developer contributions to the open movement will be introduced to the software that holds various WikiProjects, MediaWiki.

There will also be a session on Cryptocurrency specifically dedicated to PIVX to expose people to trends in cryptocurrencies, how enthusiasts could start mining and will be given a startup booster with a complimentary wallet.

It is heartwarming to know that in pursuance of the mission of the open movement to making knowledge about open resources free and accessible to all, this event is going to be free to participants.

There are however limited seats available and therefore participation is strictly by registration which is also subject to the approval by the organizing Team based on merits.

Register today via www.summeropenschool.eventbrite.com.

Sunday, 3 September 2017

App Inventor 2 Power Users FAQ


Welcome.

I apologize for being away for sometime. I was involved in a summer camp that took most of my time. Thankfully, that is done and your regular programming can continue.

The App Inventor 2 Power Users FAQ is your link to all things App Inventor. It is a collection of tips, tools, tutorials and best practices acquired by the App Inventor community.

This blog is also listed under the Books, Tips, Tutorials on App Inventor 2 section. It is gratifying to have the work you do recognized by your peers.

After you do the basic tutorials in App Inventor, this is the best place to look. It contains all the resources you need to learn and master App Inventor.

So if you are looking for new project ideas or inspiration, give App Inventor 2 Power Users FAQ a look.

Tuesday, 15 August 2017

Applications Now Open for 2017 Autumn GE Lagos Garage


The fourth edition of General Electric’s (GE) advanced manufacturing and skills training program for entrepreneurs is scheduled to take off in Lagos, Nigeria on the 4th of September, 2017. The “GE Lagos Garage” is an immersive, four-week program dedicated to accelerating the impact of Nigeria’s most promising entrepreneurs, especially in advanced manufacturing. This program is designed for hardware entrepreneurs that have an existing product or idea and want to learn how to apply cutting-edge manufacturing technology like 3D printing to their product development processes.

GE created the Garages program in 2012 to reinvigorate America’s interest in invention, innovation, and manufacturing. In 2014, Garages went global with four weeks of intensive workshops at GE’s offices in Lagos, Nigeria, using the latest in advanced manufacturing technologies. 3D printers, CNC mills, and laser cutters. In December 2016, GE Nigeria launched a permanent installation of the Lagos Garage, a hub for training, strategy development, advanced manufacturing-based innovation and collaboration. So far, four cohorts of 95 entrepreneurs have gone through the program. During this period, several viable micro and small business enterprises have been birthed and are thriving as a result of training and support received during the Garage training program.

During this iteration of the Garage program, selected participants will be granted access to a variety of world-class instructors, investors, technical experts and partners, and learn how to create innovative products using front-line manufacturing technology and rapid prototyping. They will also learn to apply the core principles of design thinking, product development, finance, marketing, sales, and customer acquisition in real-time to their ventures. Finally, the Garage will also provide participants with unfettered access to an expanding network of dedicated mentors and alumni to support them in starting and scaling their companies, and in building a culture of collaboration and innovation to bring their most innovative ideas to life.

Interested entrepreneurs can apply for the free program by clicking here.

For further information about the Lagos Garage, please contact the Associate Program Manager, Demilade Adesiyan at demilade@neubridges.com or via mobile at 08051960057.

Sunday, 13 August 2017

Drawing Adinkra Symbols using Python - Dame Dame


Dame Dame means "chequered or checkered" as in the pattern on a chess or draught board. It is the symbol of intelligence, ingenuity, and strategy.

We will use a grid of 5 pixels to trace out the image. The image of this is shown below:


This symbol consists of an outer circle with an inner square, lines and rectangles. It is quite straightforward to draw it.

The plan to draw this shape is as follows:
  1. Draw the inner filled square
  2. Draw the outer circle
  3. Draw the rectangle and line for the position where the rectangle faces right
  4. Draw the rectangle and line for the other heading positions
Before we start, note that the size of the line of the shape is 2 squares. For the size we intend to draw the shape at, this means that we must change the size of our pen to match 2 squares in our grid.


Using Turtle Graphics
In the last section we used a 400 X 400 pixel grid. We will also use it here. Copy out all the code from the top until you get to the section for the command to draw the grid. You will have a grid as shown below:


From this point on, we shall use the 400 X 400 pixel grid. So copy the code that achieved the grid into a file and call it template.py.

Rename the template.py file to damedame.py and let’s get ready to code.

The first thing we are to do is to set the pensize to 20 pixels.

The code to do this is shown below:

turtle.pensize(20)

The left hand side of the square starts from (-60, 60). So we need to move the turtle there. The code to do this is shown below:

turtle.setposition(-60, 60)

Next we begin the fill. Before we do that, we need to also place the pen down. The code to do this is shown below:

turtle.pendown()
turtle.begin_fill()

Now we can start drawing the square. We start by drawing from its current position. The turtle is 120 pixels in length so we move our turtle forward by 120 pixels. The code to do this is shown below:

turtle.forward(120)

Next we turn right by 90 degrees. The code to do this is shown below:

turtle.right(90)

We do this 3 more times. A much more efficient way to do this would be to use a loop. I will leave that up to you. The rest of the code will now be:

turtle.forward(120)
turtle.right(90)
turtle.forward(120)
turtle.right(90)
turtle.forward(120)
turtle.right(90)

Now we can end the fill. The code to do this is shown below:

turtle.end_fill()

Our generated shape is now as shown below:


Next we draw the circle. The position of the circle is at 170 pixels from the center of the circle.

Our first step will be to lift up our pen. The code to do this is shown below:

turtle.penup()

Next we move it to the place on the grid where (0, 170). The code to do this is shown below:

turtle.setposition(0, -170)

Now we place the pen down. The code to do this is shown below:

turtle.pendown()

Next we draw a circle of radius 170. The code to do this is shown below:

turtle.circle(170)

Our generated image now becomes:


The next step is to draw the remaining parts. We will start with the part for where the rectangle is facing right.
Here all we have to do is repeat the steps that drew the square. Our first step would be to lift up the pen. The code to do this is shown below:

turtle.penup()

Next we set the heading of the turtle to 0 degrees. The code to do this is shown below:

turtle.setheading(0)

Now we move the turtle to the upper position to start drawing the line. This is at the end of the filled square. The coordinate of this location is (60, 20). The code to do this is shown below:

turtle.setposition(60, 20)

We now place our pen down. The code to do this is shown below:

turtle.pendown()

We move forward by 50 pixels. The code to do this is shown below:

turtle.forward(50)

Turn right and move forward by 40 pixels. The code to do this is shown below:

turtle.right(90)
turtle.forward(40)

Turn right again and move forward by 50 pixels. The code to do this is shown below:

turtle.right(90)
turtle.forward(50)

The generated shape is shown below:


Now lift up the pen. The code to do this is shown below:

turtle.penup()

Next set the heading back to 0 degrees. The code to do this is shown below:

turtle.setheading(0)

Move the pen to the position where the coordinate is (110, 0). The code to do this is shown below:

turtle.setposition(110, 0)

Place the pen down. The code to do this is:

turtle.pendown()

Move forward by 50 pixels. The code to do this is:

turtle.forward(50)

The generated image is now:


We go on to create the others. The remaining are for the Up, Left and Down directions with headings of 90, 180 and 270 degrees respectively.

Drawing the rectangle and line in all the directions is a simple algorithm which is given below:
  1. Lift up the pen
  2. Set the heading
  3. Move to the leftmost position for the rectangle
  4. Place the pen down
  5. Move forward by 50 pixels
  6. Turn the turtle by 90 degrees to the right
  7. Move forward by 40 pixels
  8. Turn the turtle by 90 degrees to the right
  9. Move forward by 50 pixels
  10. Lift the pen
  11. Set the heading
  12. Place the pen down at the position midway from its outer edge
  13. Move forward by 50 pixels

If we do this steps for all the directions, we will complete our shape. The hard part would be to figure out the position for the leftmost part for the triangle as found in step 3. Once we achieve that, the rest is easy.

For the up direction, the coordinate for the leftmost part is (-20, 60). The code to draw its own rectangle and line is:

turtle.penup()
turtle.setheading(90)
turtle.setposition(-20, 60)
turtle.pendown()
turtle.forward(50)
turtle.right(90)
turtle.forward(40)
turtle.right(90)
turtle.forward(50)

The generated image is now shown below:


At this stage, we have executed 9 steps in our algorithm. Before we complete the remaining steps, we need to find the coordinates of the position described in step 12 of our algorithm. The coordinates of this point for the up position are at (0, 110).

The remaining steps in our code will now be:

turtle.penup()
turtle.setheading(90)
turtle.setposition(0, 110)
turtle.pendown()
turtle.forward(50)

The generated image is shown below:


We repeat our drawing algorithm for the left direction. The coordinates of the leftmost part is (-60, -20). The code to draw its own rectangle and line is:

turtle.penup()
turtle.setheading(180)
turtle.setposition(-60, -20)
turtle.pendown()
turtle.forward(50)
turtle.right(90)
turtle.forward(40)
turtle.right(90)
turtle.forward(50)

The generated image is shown below:


At this stage, we have executed 9 steps in our algorithm. Before we complete the remaining steps, we need to find the coordinates of the position described in step 12 of our algorithm. The coordinates of this point for the up position are at (-110, 0).

The remaining steps in our code will now be:

turtle.penup()
turtle.setheading(180)
turtle.setposition(-110, 0)
turtle.pendown()
turtle.forward(50)

The generated image will now be:


To complete the image, we repeat our drawing algorithm for the down direction. The coordinates of this part is (20, -60). The code to draw its own rectangle and line is:

turtle.penup()
turtle.setheading(270)
turtle.setposition(20, -60)
turtle.pendown()
turtle.forward(50)
turtle.right(90)
turtle.forward(40)
turtle.right(90)
turtle.forward(50)

The image generated is now shown below:


At this stage, we have executed 9 steps in our algorithm. Before we complete the remaining steps, we need to find the coordinates of the position described in step 12 of our algorithm. The coordinates of this point for the up position are at (0, -110).

The remaining steps in our code will now be:

turtle.penup()
turtle.setheading(90)
turtle.setposition(0, -110)
turtle.pendown()
turtle.forward(50)

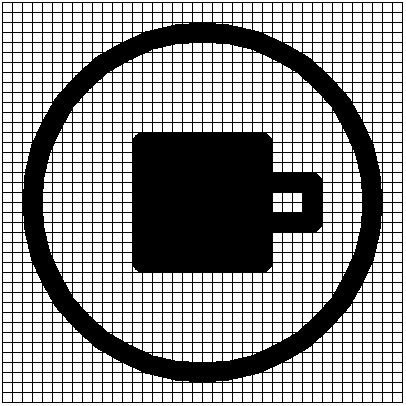
The generated image is now shown below:


Conclusion

At the end of this post, we have successfully used the Python turtle environment to draw the Dame Dame symbol.

It is inspiring to think of architecture based on this symbol. It would be an edifice to behold. A 3D model of this would be a great first step.